

Business banking built for you.
Keep costs down and productivity high. Accept payments, pay your team and stay in control of your spend.
- Streamline payroll
- Accept payments
- Disburse airtime
- Smart security
- Access insights
- Reliable assistance
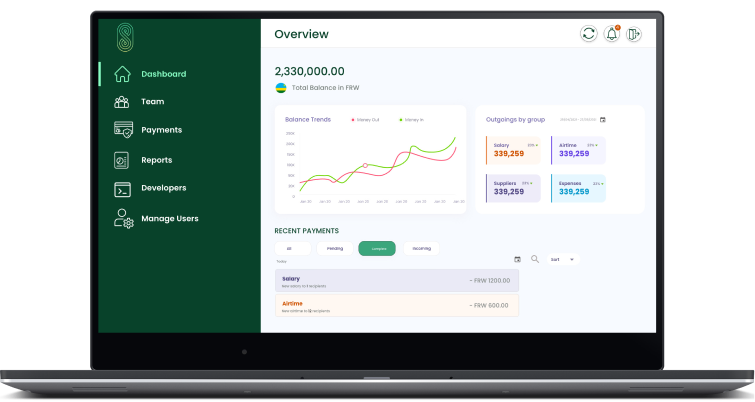
Pay and get paid, in seconds
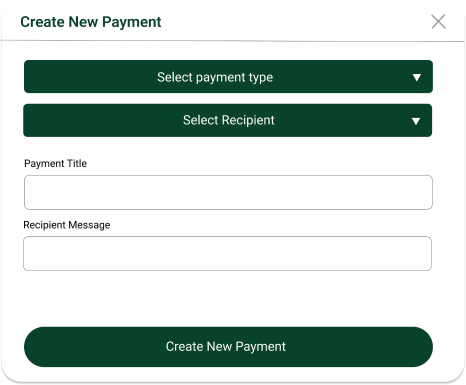
Make instant business payments.
You’re in control. Review your transaction history. Get instant notifications when you receive money. Spend with confidence.
Accept direct digital and online payments.
Seamlessly integrate our Business API for a customised experience. Your payments keep going, 24/7 — backed by advanced fraud protection and rigorous security.

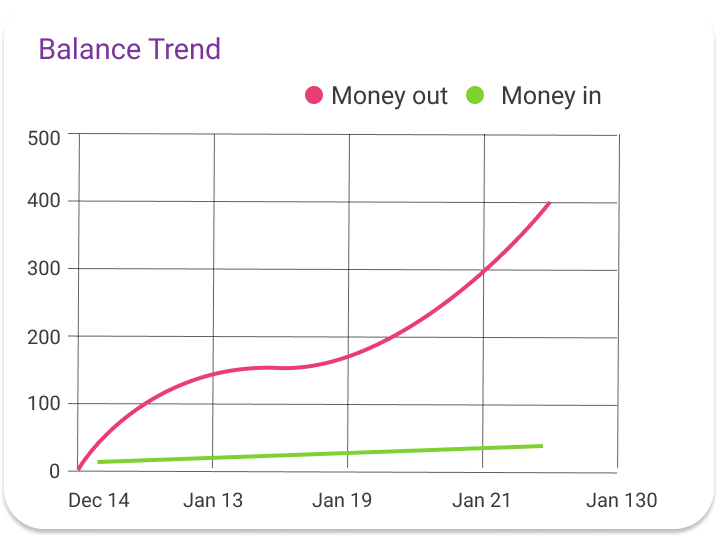
Get the most from your money.
Efficiently manage incoming and outgoing funds, ensuring streamlined operations and financial success for your business.
How to join SPENN Business?

Send us your company details
Our team will find the perfect solution for your business to make sure it meets all of your business needs.

Set up your account
Your account can be set up in minutes. Once the commercials have been defined the account is good to go.

Start transacting
Start using SPENN Business to its full potential. Use our APIs for accepting online payments, disburse salaries, airtime and py your suppliers.
How to
- After successful login into SBS, click “Verify Email”
- An email will be sent to you with verification link
Open your email client and click the verification link to verify your email
- Users can access their business QR code by clicking on the QR Code icon accessible on the dashboard at the right top corner.
- Users can download a PDF file with their QR code by tapping the “Download” button.
- With QR code, Businesses can start collecting funds through the scan to pay option available in SPENN consumer app.
1. Create Savings Account
- Navigate to the savings page by tapping the “Savings” button found at the dashboard.
Click, “Create Savings Account” then confirm by clicking the “Ok” button in the confirmation widget.
2. Moving Funds
- Users can move funds between their Spending and Savings accounts by tapping the “move funds” button in the savings page.
- Once in redirected to the moving funds page, Users can choose to either move funds from spending account or savings by toggling between the to and from then enter the amount and click “continue” button.
- Users can review the transaction details then tap the “continue” button and confirm the transaction.
Step 1: Tap ‘Transaction history’ from the side menu panel
Step 2: Click ‘Account Statement’ button found in the right top corner
Step 3: Once in the Account Statement page, Select [Start date, End date, Account] then click ‘Apply’ button
Step 4: An Account statement will be generated, you can choose to either download csv OR pdf file